Sunday, February 17, 2013

Illuminated Letters

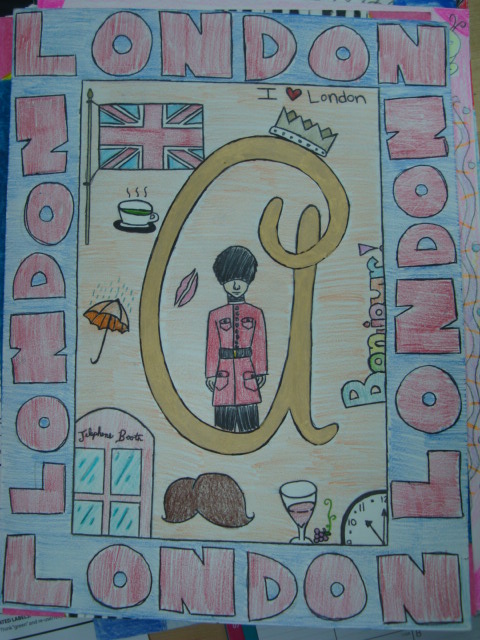
After a brief history of Illuminated Letters (using a PowerPoint slide show I made), students were asked to use one of their initials for a large design.  They had to use an interesting style (font) for their letter and include a border.  Some students used random patterns and designs, others used a theme.  The theme might have related to them personally, or related to another topic (i.e. the ocean, sports, etc.)
Here is an example of an old Illuminated Letter I show the kids:


Often, the artists applied a gold leaf paint to the design ----hence the term Illumination.  I purchase gold leaf marker pens.  The kids love it.  


Here are some finished products!  (Great start of the year project)


8th Grade Clay Projects!


This is how I set up the glaze "stations".  Students would get their glazes from me, but if they had left-over, or when they were finished, they would simply place their cup of glaze in to the labeled area.  Each day they came in, they knew where to look for their desired color(s).  It helped me to keep it organized.  The kids handled it really well.  Waste was not an issue.


I had a table in the front of the room with sample pieces so the kids could see what the colors will look like.


Illuminations - 8th grade


This project was done with colored pencils and 12x18 Pacon brand construction paper.  I have used both the Peacock and Tru-Ray and love them both.  The paper is super smooth and the colored pencils show up beautifully.
Prior to beginning this project we reviewed shading/value techniques.  Students were given a 1/2 sheet of black construction paper to practice creating a change in value with varying amounts of pressure on the colored pencil.  They practiced value scales, value "tornadoes" (my name for mini value scales starting dark to light), and making lines and shapes "glow".

Friday, August 31, 2012

New Year ~ New Look

Here are some photos of my classroom.  I still have some things to put up and other things to put away.  But so far, so good.  I was fortunate enough to be able to add some color on two of my walls.  Wow - what a difference!

An idea I got from Pinterest....love it!  I plan on changing it each month.  Perhaps I can get some student involvement!

My desk area.  Not finished yet...  ;)

Another idea I saw on Pinterest.  :)

Room Rules

The blinds on the windows are getting old....and have had their share of paint splatters and marks.   I knew I had to make it look better.  I figure if things start looking bad, the kids might not treat things as nicely.  Plus, the blinds were just four more huge blank spaces that needed something -- color!  So I painted on them using acrylic paints.  I also used sharpies for outlining and detail.


The numbers on the backs of the chairs are written on paint color sample cards.  (free!)


It's probably hard to see, but on the far right I have a paint can with "paint" flowing out of it towards the letters.  The "paint" colors are simply red, blue, and yellow plastic tablecloths I got from the dollar store.

I like to have something on the cabinets to show which belong to which hour.  This year I decided to take some cheap plastic palettes, paint the hour's number in the middle, then paint in each well.  I used acrylic paint.  They turned out well!  :)
Each cabinet with a numbered palette has storage bins inside.  The number represents the hour.  For example, 1 is 1st hour.  I love having this available for the kids.  It allows them to store their supplies without having to take it back and forth from their locker.

A basic clean-up list posted near the sinks....something new this year.  I plan on going over the procedures with the kids - but I 'm hoping that this might serve as a nice reminder when needed.


A few mini-paintings I made.  The letters are stickers.


I bought some Crayola whiteboard crayons...I think I'm going to like them!  They wipe off pretty easily.